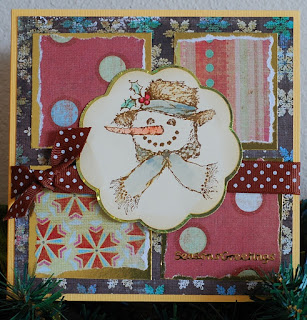
Showing posts with label Tim Holtz Distress Inks. Show all posts

Thursday, May 17, 2012

Happy Birthday Dad

Morning this is a quick post of a card I made for Dads birthday last weekend. He loves his photography, especially of the natural world and can be found usually camped out in the scrub and undergrowth of the spanish nature reserves stalking his subjects.
If you fancy taking alook at you can see his photos here at http://www.pbase.com/ednjoan


Card Recipe

Craftwork card blank 8x8"
Backing Papers - DCWV mariposa 8x8" stack
Stamps - Stampers Anonymous Captured Moments & Attic Treasures
Sentiment - Kaisercraft stamp
Distress Inks - Walnut Stain, Weathered wood, peeled paint, scattered straw


Thanks ever so much for looking


PhotobucketPhotobucket

Tuesday, May 15, 2012

Just to Say............


I would never have predicted this week would turn out as it did.
Anthony's stomach pains reached such a point where he had to be admitted to hospital as an emergency last Wednesday, by Saturday afternoon he had had major surgery, and today, Tuesday, he is leaving the intensive care unit to continue his recovery on a ward.
 Thankfully he is recovering well and looks so much brighter than he has done for weeks. This morning he was allowed a cup of tea, the first thing to pass his lips in 10 days - it was the best cuppa he had had.
He has a long way before he is fully recovered, but there are small improvements everyday.

So I needed no better reason to make a card for this weeks Stamp-N-Doodle  challenge to create a mans card - So this is for Anthony.....


Card Recipe
Craftwork Cards - 8x8" card blank
Tim Holtz Ideology Kraft Resist paper
Kaiser craft Balloon paper
Little Yellow Bicycle - Metal Gear & Brad
Spellbinders Sprightly Sprockets Dies
Distress Ink - Chipped sapphire & fired brick

Thanks for stopping by for a look. x

PhotobucketPhotobucket

Tuesday, April 24, 2012

A few Bows and a few Ribbons......


The Stamp-n-Doodle challenge has ended up quite girly for me this week, and I thoroughly enjoyed putting together all the colours, and is a bit of a departure from the more serene cards I have been making of late.

The image of the girl from Stamp-n-Doodle really depicts how I see a modest young girl/teenager, who has just gained that little bit of freedom to shop with her friends.
I really enjoyed colouring her, and I think I am finally gaining some confidence and dare I say it 'the knack' of promarkers. Though I have to say using the right paper helps enormously with the blending of the colours.


Card Recipe
8x8 inch white base card
Patterned papers - Basic Grey, Out of Print collection
Cricut cartridge - Elegant edges, Eyelt3 cut (pg68)
-regular shape (lilac shape) cut at 8"
- dark purple shape, is oblong cut at 5.5"
Digital Stamp-n-Doodle stamp - Chatty Teen
Distress Inks - Dusty concord, worn lipstick
Martha Stewart punch
Ribbons, plain cardstock and rubber stamp all from stash


Just a reminder of our 25% off DIGI OF THE MONTH happening right now at STAMP-N-DOODLE SHOP. Our April image will be featured all month at SPECIAL SAVINGS, so go check it out:) If you haven't visited our SHOP yet, make sure you cruise on over to STAMP-N-DOODLE SHOP - Lynne has so many wonderful digi and rubber stamped images as well as her FABULOUS line of Crafts U Print items and NEW ITEMS being added all the time! Also, make sure you check out the work of our FABULOUS NEW Tutorial DT members at THE LEARNING CENTER part of the shop.


PhotobucketPhotobucket

Friday, April 20, 2012

Christine's Hibiscus


Hello, today I have a card with an image drawn by Christine Gray, this gorgeous hibiscus reminds me of a plant that we had in our garden in Wales. We inherited it with the garden, and for about 2 weeks each year it would be full of beautiful white blooms, very much like I have coloured here. It was beautiful.


The flower is coloured with promarkers, and then masked so that I could colour tint and stamp the background with Tim Holtz scattered straw ink, and his butterfly stamp. The music and swirl stamps in the background also are by Le Blanche.


You can click on Christine's link above to see more of the images that she has been drawing.


 I would like to enter this card also into challenge #102 on the Sunday Sketch and Stamp blog.

Thank you for taking the time to look.


PhotobucketPhotobucket

Thursday, March 29, 2012

Sunday Sketch and Stamp challenge #99


This is my card for this weeks challenge on the Sunday Sketch and Stamp blog. I'm really enjoying using the sketches at the moment, and a great way to use the really pretty Basic grey, Capella collection of papers. Also I was able to get back to using some of my favourite stamps, these being from the wonderful designs of Barbara Gray at Clarity Stamps.


Card Recipe
6x6" base card - white watercolour paper
backing papers - Basic Grey Capella collection
Embellishments - Flower & white flourishes, cordinating card stock stickers from Basic grey
- flourishes enhanced with liquid pearls (soft pink & white opal), faux pearls, sticky gems
Tim Holtz Distress Inks - weathered straw, bundled sage, brushed courdroy, peeled paint


To create the scene in the smallest circle (2.5" diameter)  I used a collection of miniture clear stamps from Clarity, stamping them with distress inks onto watercolour paper. Having built up the scene, I used I make up sponge and again the distress inks (see the picture for colours), picking up small amounts of ink at a time and dabbing onto the paper. The bird table was masked, so it could be watercoloured  after.


Thanks for taking a look.


Photobucket Photobucket

Tuesday, December 20, 2011

Quick Christmas Cards

How are we all doing with the festive preparations. Personally I have not stopped for seems like weeks, and am definatly flagging now. Just the wasjing, ironing and cleaning to do - HOORAY (not my most favourote jobs).


Like, I bet you all needed just a few extra christmas cards too, and these are what I rustled up. My craftroom now is in complete dis-array and I have amazed myself at how messy I can be. I should really take note when I am constantly telling the boys to their rooms !!


Photobucket

Tuesday, December 13, 2011

Some Christmas Cards & Tags

As usual I am behind in the making of my christmas cards this year, making my customary slow start. For some reason I have a complete mental block when it comes to festive makings. I have 2 boys that talk endlessly about christmas, I have the tree and decorations up, and even (dare I say it) presents all bought and wrapped. But i still need to hit on those one or two christmas designs that will get me going.

I did however make these. The first 4 panel decoration started out as a card but, I liked it so much that it landed on my mantelpiece, and there it is staying. It did inspire however the scaled down version, and I was also particularly pleased with the gift tags too - made with Tim Holtz distress stains and inks and my favourite christmas stamps.


Right, I feel better now having updated you all. Now its time to rustle up a dinner from the last of the freezer food (waiting to restock next week for christmas), the bath and bed for the boys and hopefully another round of christmas cards for me. I am on a roll today and feeling quite chuffed with myself, having wrapped presents this morning and even managed to book myself that long awaited hair appointment next week. This year it is all about planning as Anthony works away now for 2 weeks at a time, and now not due back until the 22nd - and its up to me to get all the preparations sorted. The deadline for me is also the 22nd/23rd (apart from the last bits of cleaning), then we are all officially on holiday!

Merry Christmas to you all if I don't make it back before then and many good wishes for the New Year. xxx

I have entered the gift tags into this weeks challenges on the Sugar Creek Hollow blog. A lovely blog that is concerned only with all things vintage in crafting, and a site that I will continue to visit many more times.

Photobucket

Monday, September 19, 2011

Brayered Birthday Card


Hi, although I have not posted in a fair while, I have still been making. Now that I am getting the school routine running well, I am planning to post again on a much more regular basis - and I have a lot to share with you.
This card is for an Aunt of mine who has never forgotten my birthday, and my family's in years. This year she is celebrating a special birthday.
I have brayered the background with Tim Holtz distress inks and over stamped with some new tree and foliage stamps from Clarity Stamps.

Photobucket

Monday, July 11, 2011

Memory Book


Cricut Imagine Cartridge - Elise & Country Carnival
Chipboard book from stash
Tim Holtz Ranger Distress Crackle Paint - Milled Lavender
Tim Holtz Distress Ink - Milled lavender
Embellishments from stash


This project was originally goingto be a monogram birthday card for my friends daughter, but as you see it developed into a memory book spelling out the name. It is a project that I have been hoping to do for a while now, and this was the ideal opportunity.
I painted the chipboard pages initially with kaisercraft eggshell paint, then coated the outside edges with the distress crackle paint, giving it a lovely lilacy glow. The crackles of the paint were accentuated with the co ordinating distress ink in the Tim Holtz range.
The lettering is from the Cricut Imagine cartridge Country Carnival and I managed to transfer the patterns from the Elise cartridge, for a really pretty girly colour pallette.

Each page has a space for journalling for my friends daughter to record memories of best friends, family, special times, and favourite things.


I apologise that the quality of the photos are not great, I am in the process of learning, and for some reason these just did not work. I am really aiming to improve.

Thanks for taking the time to look.

 
Photobucket

Sunday, June 19, 2011

Finally # 3 - From Me

I really enjoyed making this for Dad, I was able play around with my stamps and inks, the creating that I really enjoy.
Apart from the tiny background newspaper print (printed from the Imagine country carnival cartridge), and the text on this card, it is all stamped and inked.

I was naughty a couple of weeks ago and succombed to another set of Tim Holtz stamps (well they were in the sale and it would have been rude not to !!?!), and I put them to good use here, the bike, clock face and chequered numbers had a vintage London feel to them - perfect for Dad.   The London theme of course, not the vintage......how could you think such a thing ! hehe (only joking Dad x)

I used the faux herringbone stitched ribbon rub-ons in the background (that was a mouth full).
I made the scrolls in the cluster around the photos and stamped and embossed in copper the padlock and key.

Really love those stamps, so keep an eye open, they may crop up some more!

Thanks for looking, bye.

Saturday, April 16, 2011

Mothers Day Card

I am particularly proud of this card, as it is one of those that actually turned out the way I imagined it. How many times do we all sit down with an idea in our head, and find that what we actually create is completely different??
Hopefully this card demonstrates that Tim Holtz distress inks can actually create a soft and pretty feminine card, and not just the strong 'grunge' style that is synonymous with his name.


Card Recipe
White smooth coated card stock 
White floss card
Cream card stock, 8x8"
Bazzill basics card stock, olive green & a lighter spring green (sorry no names)
Basic Grey paper, Wisteria Collection, muted flower paper, 8x4"
Butterfly and dragonfly stamp by Judikins
Various floral stamps to create background
Tiny dragonfly & flower stamps by Hero Arts
2 eyelets, and 2 'bug' charms
Fabulous Finds Cricut Cartridge
Ranger alcohol inks (sandal, currant, salmon)
Tim Holtz Distress Inks ( bundled sage, crushed olive, broken china, victorian velvet, pumice stone )

  1. Fold the 8x8" cream card to make the 8x4" card base Cut one side of the card to create 2 4x4" squares, on which to mount the two feature panels.
  2. Cover the base of the card with the Basic grey patterned paper.
  3. Cut 2 4x4" squares from the white smooth card and apply the distress inks to resemble a soft landscape (to both panels). As a base I used pumice stone all over, and the victorian velvet to a centre section. The top half of the panel I worked in the blue broken china, and on the bottom half worked in the bundled sage, ensuring that some of the pink victorian velvet could still be seen. I finished off running the pumice stone (a really useful colour) all round the edges of the card.
  4. Using the same inks and the various floral stamps I created the meadow effect stamped background. To keep the muted feel, I inked the stamp and lightly blotted it once on scrap paper, before stamping onto the panels.
  5. Using the large butterfly and dragonfly stamps and the crushed olive distress ink, stamp the images onto a sheet of gloss card that had previously been coloured using alcohol inks. When fully dried, the images were cut out and mounted on the panels, and the wings shaped slighted (with fingers) to create the 3D effect.
  6. Mat and layer each panel onto the light green bazzil basics card, then again onto the olive (darker) green bazzill.
  7. Return back to the base card and position it in fron of you (folded) as a landscape card (longest length east to west). Working on each 4x4" panel separatly and starting with the left panel, lightly drawer a pencil line diagonally from the top right corner to the bottom left. Repeat with the right panel, this time drawing from the top left corner down to the bottom right.
  8. Take a scoring tool and score along the line and fold crisply with a bone folder.
  9. With the card laying flat and folded in front of you take one stamped panel, turn once to the left (from the original position) and adhere to the botton triangle scored on the left hand side of the card.
  10. Repeat with the other stamped panel, turning it once to the right, and adhere to the bottom triangle of the scored panel on the right hand side of the card.
  11. When you open the easel elements of the card, the images should be in the right orientation.
  12. Using the fabulous finds cartridge cut the bookplate16 and insert from bazzill basics olive card & smooth coated card respectively, at 1.25". Create a stamped meadow effect to suit size, using the method from before. Use archival black ink to stamp the sentiment. Stick the elements together and add eyelets.
  13. Using sticky foam pags stick to the base of the card (on top of the basic grey accent paper)
  14. Take 2 co-ordinating charms and place with 3D foam in a position that will hold the easels of the card.

I have provided a link to this card on the Make it Monday blog challenge.